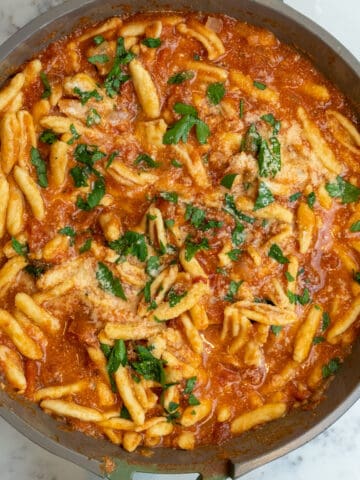
Homemade Orecchiette is made with flour, water, and salt and kneaded into a dough and shaped with your hands.

Making homemade orecchiette has been on my list of pastas to make from scratch! Since I love cooking broccoli rabe, orecchiette is known to compliment it best.
How to make Homemade Orecchiette
Place 4 cups of the flour on the counter and make a well. Add 1 ½ cup of water and 1 teaspoon of salt into it and using a fork, incorporate the flour into the water. Eventually, the mixture will become a dough. You can use a dough scraper to incorporate the rest of the flour. The dough might feel pretty dry but just stick with it until you get a ball. If it is too dry sprinkle water. If it is too sticky dust more flour onto your work surface and work it in. You want to end up with a ball that’s not too sticky and not too dry. Knead for 8-10 minutes, do not overknead or the pasta will become chewy. Cling wrap or keep the dough in Tupperware for one hour. This is important as it will help the dough become cohesive.
After 1 hour, cut the dough into 8 pieces. Use one of the piece and keep the rest of the dough cling wrapped or in the Tupperware so it won’t dry up.
Using the one piece, make a thin rope with your hands. Cut half inch sized pieces with a knife. Using your thumb, leave a thumb print of the small piece and then unfurl the piece over your thumb in the opposite direction to form a concave shape. Repeat with the remaining dough.
Leave the orecchiette to rest on the baking sheet for 10 minutes and they will be ready to boil!
Feel free to try my Homemade Cavatelli and my Homemade Ravioli Florentine.
Print
Homemade Orecchiette
- Total Time: 2 H 5 minutes
- Yield: 4 servings 1x
Description
Homemade Orecchiette is made with flour, water, and salt and kneaded into a dough and shaped with your hands.
Ingredients
- 4 cups of flour
- 1 ½ cups of water
- 1 teaspoon of salt
Instructions
- Place 4 cups of the flour on the counter and make a well. Add 1 ½ cups of water and 1 teaspoon of salt into it and using a fork, incorporate the flour into the water. Eventually, the mixture will become a dough. You can use a dough scraper to incorporate the rest of the flour. The dough might feel pretty dry but jut stick with it until you get a ball. If it is too dry sprinkle water. If it is too sticky dust more flour onto your work surface and work it in. You want to end up with a ball that’s not too sticky and not too dry. Knead for 8-10 minutes, do not overknead or the pasta will become chewy. Cling wrap or keep the dough in Tupperware for one hour. This is important as it will help the dough become cohesive.
- After 1 hour, cut the dough into 8 pieces. Use one of the piece and keep the rest of the dough cling wrapped or in the Tupperware so it won’t dry up.
- Using the one piece, make a thin rope with your hands. Cut half inch sized pieces with a knife. Using your thumb, leave a thumb print of the small piece and then unfurl the piece over your thumb in the opposite direction to form a concave shape. Repeat with the remaining dough.
- Leave the orecchiette to rest on the baking sheet for 10 minutes and they will be ready to boil!
Notes
- Cook right away or dry for later
- The pasta is long-cooking, so there’s time to make sauce
- I recommend making broccoli rabe.
- Prep Time: 2 H
- Cook Time: 5 minutes
- Category: Dinner
- Method: Pasta
- Cuisine: Italian
Nutrition
- Serving Size: 1
- Calories: 328
- Sodium: 0.9 mg
- Fat: 3.2 g
- Saturated Fat: 0.5 g
- Carbohydrates: 62 g
- Fiber: 3.3 g
- Protein: 11 g
- Cholesterol: 0 mg


Leave a Reply